
A storage system earns its place during the busiest minute of the lesson: one group is returning instruments, another is waiting, and the next activity needs to begin. Classroom percussion storage ideas should be judged in that moment, not only by how tidy the shelves look before students arrive.
Start by watching one complete lesson. Notice which instruments travel together, where students hesitate, and what the teacher has to find repeatedly. Those observations give music room instrument storage a practical brief: shorten the search, protect the instruments, and make the correct return location obvious.
Classroom Percussion Storage Ideas: Give every location a musical job
Separate everyday hand percussion from less frequently used equipment. Keep items needed for the same routine near one another, while respecting their individual storage requirements.
Avoid a single deep container that hides everything beneath the top layer. Shallow divisions make it easier to see the contents without tipping them onto the floor.
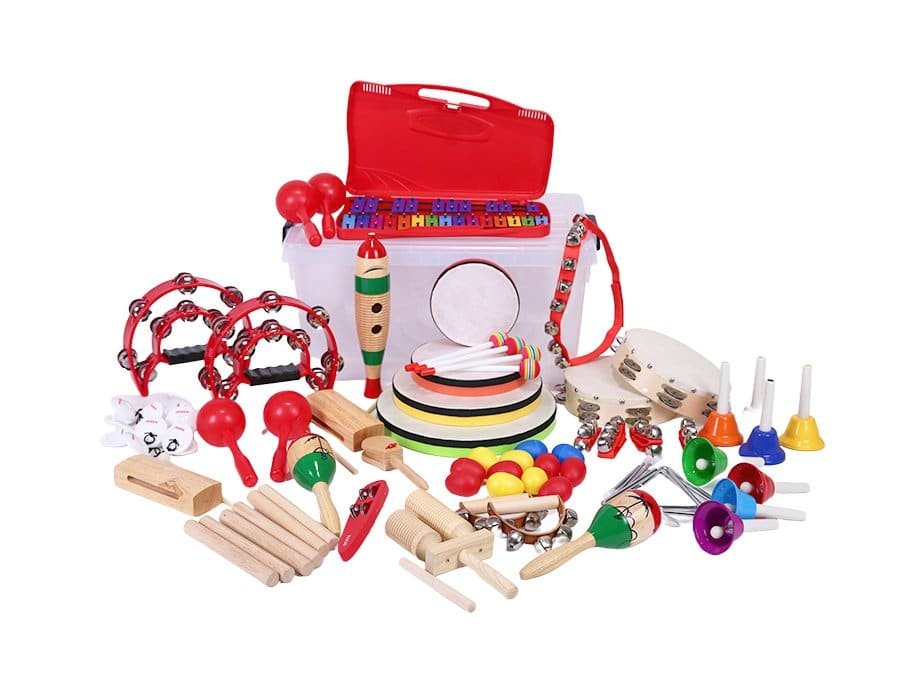
A classroom percussion set may already include a case, basket, or tray. Evaluate whether that format works for your actual distribution routine rather than assuming the supplied packaging is the best permanent classroom home.
Plan three distinct zones
A useful small-room layout separates ready instruments, items awaiting care, and teacher-managed equipment.
| Zone | Purpose | A practical location rule |
|---|---|---|
| Ready to use | Normal classroom supply | Visible, clearly labeled, and easy to count back. |
| Awaiting attention | Cleaning, drying, missing parts, or damage | Physically separate from the ready supply. |
| Teacher managed | Larger, delicate, or infrequently used items | Accessible without blocking student movement. |
These classroom percussion storage ideas prevent a common problem: an instrument with an unresolved issue quietly returning to the usable collection.
For Orff instrument storage, make room for the full body and its approved support arrangement. Do not use a tone-bar surface as a convenient shelf for unrelated equipment.
Label the return, not just the container
Good percussion storage labels tell a student what belongs in a space and how it should look when complete. A photograph, simple outline, or clear instrument name can work better than a broad label such as “music things.”
For a tray of shakers, show the expected positions. For paired instruments, show the pair rather than a single example. For mallets, identify the instrument or approved group they belong with.
In small percussion organization, labels should reduce the need to ask an adult. Test them with a student who did not help arrange the shelf: can that student return an item correctly without a demonstration?
Keep mallets with their intended instruments
Loose mallets tend to migrate toward whichever box is nearest. Give them an identified home and avoid mixing different types merely because their handles look alike.
For Orff instrument storage, a suitable separate holder or approved storage point can keep mallets available without placing weight on the bars. Follow the instrument's instructions for its position and handling.
Compare the body sizes of Orff xylophones and metallophones before measuring a shelf. The category name does not tell you the clearance, weight, or access needed for a particular model.
Test the system with a real handout
Choose a familiar activity and time only the practical transitions. How long does it take to distribute the instruments, begin, stop, and restore the room?
Ask students where they had to wait. A storage arrangement may be neat but create a bottleneck if every child needs the same narrow corner.
For music room instrument storage, consider bringing a prepared tray to the group rather than sending the whole class to a cupboard. The better option depends on supervision, room size, and the equipment involved.
Classroom percussion storage ideas become more useful when tested with actual movement. An arrangement that requires students to step over cases or reach across another player's instrument needs revision.
Use a short end-of-lesson reset
Assign a few clearly defined jobs: count the returned pieces, place approved mallets, check the tray positions, and report anything missing or damaged. Keep these tasks separate from maintenance students are not authorized to perform.
Use percussion storage labels as the reference during the reset. If an outline remains empty, the group knows what to look for before leaving.
Small percussion organization is easier when the final check is visible. A photograph of the complete tray can help the next teacher confirm that the collection is ready without opening every bag.
Change the system as the teaching changes
Review the layout after several weeks. Move rarely used items out of the prime handout area and give frequently paired instruments a more convenient relationship.
For music room instrument storage, flexibility is more valuable than buying a large unit before understanding the daily routine. Reusing a suitable tray or divider may solve a specific problem more effectively.
Recheck Orff instrument storage whenever a new model arrives, since its body or support may not fit the space reserved for a previous one. Update the percussion storage labels at the same time.
Plan a More Usable Collection
The most effective classroom percussion storage ideas leave the room easy to use at the next lesson: instruments can be found, returned, and checked without turning storage into a separate classroom activity.